
DNS records serve to facilitate domain name translation and help visitors reach your website online. When a domain is created in Plesk, all the necessary DNS records are added automatically. However, Plesk also enables you to add custom DNS records, as explained below.
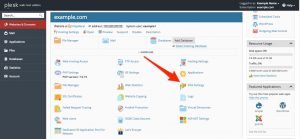
To add a custom DNS record to the domain’s DNS zone in Plesk Control Panel:
- Login To Plesk Control Panel.
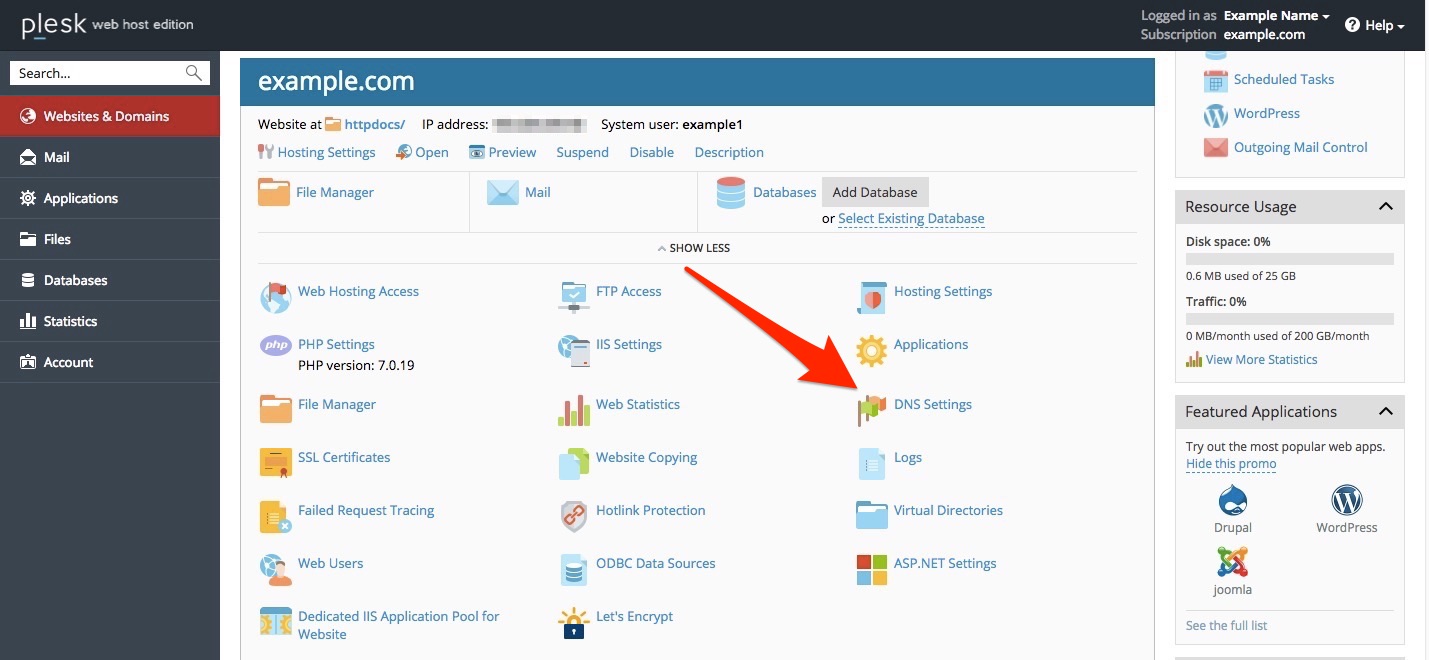
- Go to the Websites & Domains.

- Locate the name of the domain you wish to create the DNS record for.
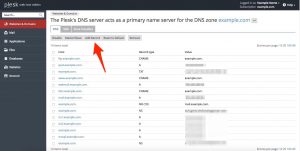
- Click on DNS Settings.
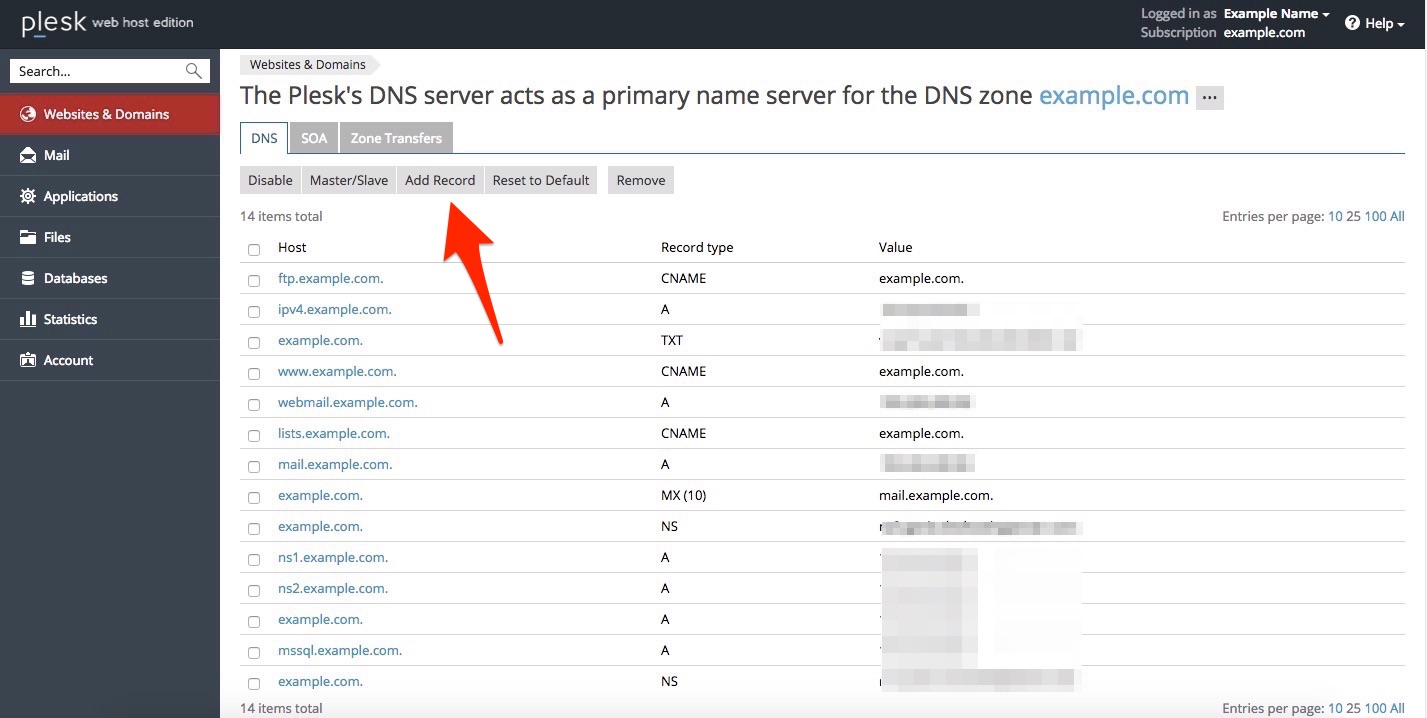
- Click on Add Record.
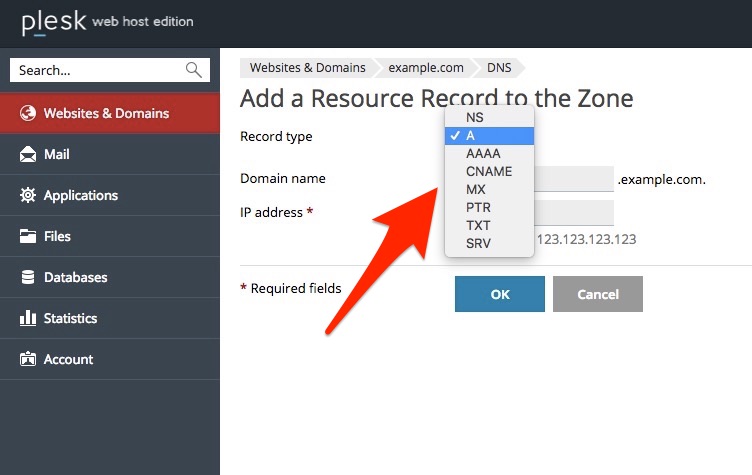
- Select the type of DNS record you want to create from the Record type drop down list. The options are:
- NS: Create a nameserver record.
- A: Create an A record.
- AAAA: Create an A record for an IPv6 IP address.
- CNAME: Create a Canonical Name record.
- MX: Create a Mail exchanger record.
- PTR: Create a Pointer record.
- TXT: Create a Text record.
- SRV: Create a Service Locator record.

- Enter the details of the new DNS record you’re creating. The information Plesk asks for will vary depending on the type of record you are creating.
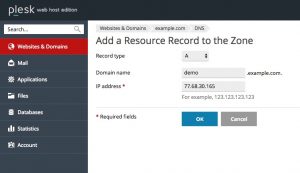
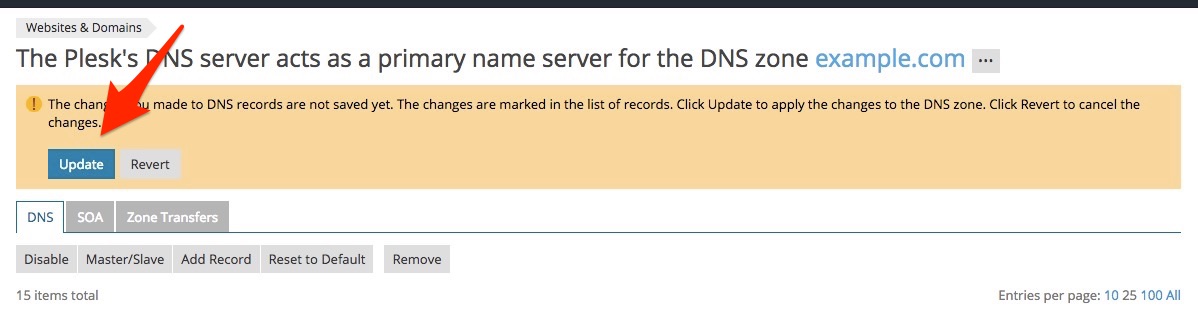
- When you are done, click OK.
- On the next screen, click the Update button to save the DNS record deletion changes to the server.
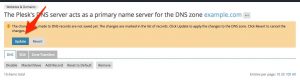


Note: Please remember that DNS Records changes can take 24 to 48 hours to propagate.